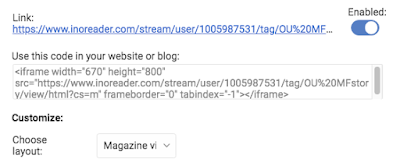
So, in the previous post I explained about Inoreader HTML export, and specifically how that works for folders. In this post, I'll show how that works for tags, along with some more thoughts about tags and folders in Inoreader.
To turn on and then configure HTML export for a specific tag, just click on the tag in the left-hand column, and you will see the same menu options (well, mostly the same) as for folders:
Folders versus Tags
The best way to think about folders in Inoreader is that they are like "automatic tags" that you cannot alter. You'll see what I mean when you edit the tags for an item from a feed that you have in the folder: you will see the folder name listed as a tag, but unlike the tag-tags, you cannot delete the folder tag. You can see how that works when you are editing tags on an item. For example, this item comes from a feed that is filed in two folders, so it has two folder tags, plus there are two additional tags; those additional tags have little x's by them because I can remove those tags, but the folder-tags cannot be removed:
But there's the thing: if you want item-by-item control, tags are the way to go. With tags, you can create rules that automate how the tags are assigned, but you can also override those rules by manually removing a tag, and you can also add tags manually at any time.
For example, with my classes, I put the students' blog feeds in folders by class, but I also use a rule to automatically assign a class tag to every item in those folders. Basically, it duplicates the folder tag but with this important difference: I can remove my tag if needed. So if a student accidentally posts something in their class blog that's an assignment for another class (which has happened), I can remove the tag, and thus remove it from the class stream. Also, if a student ever did post something inappropriate, I could remove it from the class stream by removing the tag. That's never happened, but just for my own peace of mind, I like the fact that tags give me control, item by item, of everything that appears in the export stream.
So, that's a strategy I would recommend to people if you will be using the HTML export features. Instead of exporting folders, instead think about setting up a rule that also assigns a tag to every item in a folder, and then export-by-tag instead of export-by-folder. It's really not that much overhead (you set up the rule and it runs in the background; you don't have to do anything), and if/when you actually do want to add or remove an item manually from the export stream, you'll be able to do that!
Okay.... that's the nitty-gritty of exporting folders and tags as HTML, and now something really cool: Embedding HTML Clippings.


