Pages

Showing posts with label Summer2020 Inoreader. Show all posts

August 11, 2020

Summer2020 Blogging Fest

I retired from teaching after the Spring 2021 semester, but I'm still here, and glad to answer questions about blogging, RSS, etc. I'm at Twitter @OnlineCrsLady... and I have a new blog: Laura's Bookshelf.

Back in March, I published some notes about blogging in case people were interested in setting up a blog to use in conjunction with all-of-a-sudden teaching online; those notes are here: Be There with Blogging.

Now that the impossible semester is over, I will be taking some time to this summer to share some more detailed information about blogging, both as a strategy for fully online courses but also as a strategy for any course, including classroom-based courses. I've taught using student-blog-networks for years, and I can highly recommend it as a way for students to document and share their learning. When students have their own space in which to write and in which to interact with other students, it has a completely different feel to it than an LMS discussion board. In a blog, you can be yourself, creating your online presence week by week, post by post, a personal continuity that just does not happen in a discussion board which belongs to everybody/nobody. When a blog is yours and when you share that blog with others, it's fun and exciting in a way the LMS rarely is (at least in my experience).

So, to help people explore both blogging and student-blog-networks this summer, I've divided the Summer2020 Blogging Fest into two parts:

PART ONE is focused on getting started with your own blog and learning about how blogs work.

PART TWO is focused on building a blog network, which is useful if you decide you want to start blogging with your students.

So, if you are new to blogging, start with Part One to see if you actually like blogging yourself. If you enjoy blogging, then you might be interested in moving on to Part Two, learning how to set up a network so that you and your students can blog together, sharing and also connecting in your individual blog spaces.

And if you are already a blogger, you can skip Part One and jump right into Part Two, learning how to connect individual blogs into a blog network using a free tool called Inoreader (no programming required!).

I have a few more posts to add about logistics of course design and student blogging, but all the technical posts about blogging and blog-networks are done.

So......... here we go:

Part One: BLOGGING

In this part, I will be talking about blogging in general, and the specific how-tos I include will use Google's Blogger by way of example (although you will be able to apply the same techniques and strategies on other blogging platforms).

1. Starting a Blog: Your First Post
2. Blog URLs: Homepage and Posts
6. Links in Posts
7. Images in Posts
8. Embedded Media: YouTube Videos and Playlists
9. Embedded Media: Twitter, NPR, SoundCloud
10. Editing Existing Posts
12. Blog Themes and Layout
14. Blog Sidebar: Labels for Navigation
15. Blog Sidebar: RSS / Email / More
16. Blog Sidebar: HTML Boxes
17. Posts and Pages
18. Blog Backup/Export
19. Embedding a Blog in the LMS
20. Blogs and Diigo


Part Two: BLOG NETWORKING

In this part, I will be talking about RSS in general, and specifically about how to use Inoreader both as an RSS feed aggregator, and also for running a student blog network. I'll also add some tips about student networking via comments.

1. What is RSS and what is Inoreader?
2. Subscribing to RSS with Inoreader
3. Inoreader Display Options
4. Blogger RSS for Comments and Labels
5. Inoreader Folders
6. Inoreader Tags
7. Inoreader Rules
8. Inoreader Export: HTML Clippings (Folders)
9. Inoreader Export: HTML Clippings (Tags)
10. Embedding HTML Clippings
11. More about Export: RSS
12. More about Export: OPML
13. Inoreader Bundles
14. Inoreader Star for Workflow
15. Inoreader Search
16. More about RSS: Diigo
17. More RSS: News, Podcasts, Padlet, etc.
18. Comments and Randomizers
19. Building a Culture of Feedback
20. Blogs and Completion-Based Grading


cat typing on laptop
Behold! I have a blog of my own.


August 5, 2020

Latest Posts via Inoreader


These are the latest blog posts! Just click on the title of a post to go to that post in its blog:

May 31, 2020

More RSS: News, Podcasts, Padlet, etc.


You can use any RSS feeds in Inoreader, which means blogs and also other RSS sources like Diigo. In this post, I'll provide a quick overview of some other places you are likely to find RSS.

And remember, if you can find the RSS, you can make it part of your content network at Inoreader, which means you can then export that content out to other web spaces like inside your LMS, your course website, in a blog, etc.

News Sources

News sources often have RSS feeds, and they often have specialized feeds based on the different content areas that the news source includes.

Just as one example, our student newspaper, the OU Daily, has an RSS feed: OU Daily RSS. I can subscribe to that feed in Inoreader, and have that display inside Canvas LMS, etc.

I could also create a folder with different news sources; for example, here is an education news folder I use in my Inoreader:


One way to use news sources like this is to curate a stream of special interest to your students. So, for example, you can scan through the news articles in a folder, and use a special tag to indicate items of interest to your class, and then having that tag be the stream that appears in your LMS or in your class website.

Podcasts

Podcasts are basically blogs with audio enclosures! So you will find that many podcasts offer RSS feeds. A quick search of "podcast" for feeds that people have subscribed to already in Inoreader returns over 4000 results. That's a lot of podcasts! :-)


Not all podcasts will have easily discoverable RSS feeds, but if you have a favorite podcast and they have not made the RSS feed easy to find, contact the podcast developer. They probably can give you the feed address. If not, your inquiry might prompt them to turn on the RSS feature (for example, at SoundCloud, the RSS feed is not automatic, but it's easy for a podcaster to choose to turn on SoundCloud's RSS feature).

Padlet

Padlet is a popular tool with teachers, and it has RSS, so you can subscribe to new content in a Padlet via Inoreader. Just paste in the Padlet address, and Inoreader's autodiscovery will find the RSS feed for you:


So, if your students are creating content with Padlet in addition to their blogs, you can add the Padlet content feed into the same folder as the student blog feeds. It's all RSS!

Hypothes.is

I don't use Hypothes.is with my classes, but it is a powerful tool, and it has RSS features. Maybe somebody who is using Hypothes.is will experiment with Hypothesis RSS feeds in Inoreader.  Some resources to help with that:
Atom & RSS Feeds for Annotations (from Hypothes.is)
Hypothes.is RSS Feed Widget (from Alan Levine, RSS guru)
If you have examples or tips to share of Hypothesis RSS and Inoreader, let me know!


Okay, that is the last of my Inoreader blog posts; the remaining posts in this series will be about other aspects of running a student blog network, starting with Comments and Randomizers.


More about RSS: Diigo


So far I've emphasized RSS content from blogs (since the focus here is on running a student blog network), but you can also use Inoreader to collect and redisplay content from other RSS sources. In this post, I'll show how you can use the bookmarking service Diigo to generate RSS content.

Diigo Bookmarks

I wrote a post here earlier about some basic Diigo bookmarking features, including how you can snag thumbnail images for the items you bookmark: Blogs and Diigo. See that posts for how to use Diigo to bookmark web content.

In this post I'll focus on how you can subscribe to Diigo RSS and then mix that content in with other content in Inoreader, exporting it to your class website or to an LMS.

Diigo RSS

At the bottom of every Diigo display page, including search results, you will see the RSS icon, which you can click to get the RSS feed. The icon is to the right of the display options:

For example, here is the RSS feed address for the items that I've tagged with #ungrading:
https://www.diigo.com/rss/user/lauragibbs?key=d6f0bfedadf90c44b2909bdea8e9f77e&query=%23ungrading&sort=updated

It's a scary-looking URL and the contents are not user-friendly either, but that's exactly what Inoreader needs in order to turn that RSS feed into an Inoreader display, like this:


It's just like the feed for a student blog, except this time the RSS is coming from Diigo. One thing to note is that it does not update as quickly as a blog feed does (I think Inoreader pings the feed every hour), but you can hit the manual refresh button if you want Inoreader to ping the feed for the latest results.


With a pro account, you can also boost the refresh rate on selected feeds (you can manage feed boosts via the Subscriptions panel in your Preferences).

Inoreader Export for Diigo RSS

So, just like you can export student blog content using HTML Clippings, you can do the same with these Diigo bookmarks that Inoreader grabs via the RSS. Why would you want to do that? Well, Diigo is one of those sites that blocks the use of iframe to embed Diigo inside another site. That means if you want to display Diigo bookmarks inside a website or inside the LMS, you need to use a service like Inoreader to do that.

So, in the same way that I embed the student blog stream in Canvas, I can display a Diigo bookmark stream in Canvas also. Here's a Canvas display of Diigo bookmarks related to feedback for example:


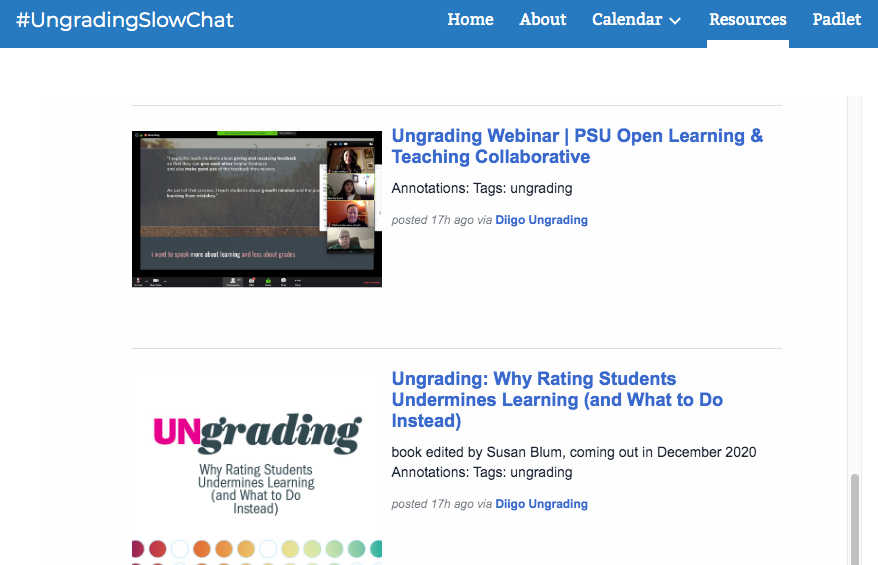
And here's an example of a Diigo stream embedded in a Google site; these are resources related to ungrading:


In both cases, I am using the Inoreader HTML Clippings to display those Diigo bookmarks, and it updates automatically as I bookmark and tag new items in Diigo.

Anywhere that you can embed an iframe, you can embed Inoreader content... which includes Diigo bookmarks. Even the thumbnail image shows up. Diigo is a powerful tool, and with Inoreader you can share your Diigo content more widely and in new contexts!


So, Diigo is one of my favorite non-blog RSS sources, and next up I'll provide a quick overview of more RSS content sources: News, Podcasts, Padlet, and more.


Inoreader Search


The Inoreader Search features are amazing; I'm not even going to try to document them all here. Instead, I'll refer you to this overview of Inoreader Search features (including the very powerful Active Search, which is a pro feature).

What I want to discuss here is the free Inoreader search feature which allows you to search all the content in your Subscriptions, including folder-specific searches. That is what gives you the ability to search all your students' blog posts. I use this feature in all kinds of ways, but one of the most important is to make connections between students.

For example, as I am reading the Favorite Places posts during the Orientation Week, one student might mention a specific city or vacation spot, etc., and I'll remember somebody (but who?) also mentioned that place; I just use Search to find the other student, and then I can leave comments for both students alerting them to their common interest. Or I'll notice that someone did a version of the story of how Ganesha got his elephant head; I can use Search to find other students who did a version of that story and let them know so they can compare versions, etc.

In the LMS, student content is spread out through different parts of the system (discussion, assignments, etc.), and there is no global search in Canvas (on the very sad subject of Canvas Search, see this post: The Paradox of Canvas's "Big Data" and Lack of Search). With an Inoreader student blog network, all the students' work leaves a trail in their blog, and Inoreader's Search feature lets me follow those trails and find connections.

One of the biggest advantages of digital content is being able to search that content. So, the lack of good search features in Canvas is one of its biggest drawbacks... while the search features in Inoreader are a big plus!

How Inoreader Search Works

You can search in a specific feed (i.e. an individual student's blog), or in a specific folder (i.e. all the students in a class), or a specific tag (i.e. a specific assignment).

To search in a specific feed, for example, click on the feed in the left-hand menubar to highlight that feed, and then type your search term in the search box. You will then see results for that specific feed:


You can also click on various filtering options; for example, you can expand the search the folder level using that dropdown, as well as other search filtering options.

As always, the Inoreader URL is very clear, and you can even bookmark a search term if you want:
https://www.inoreader.com/search/subscriptions/music

The URL does not contain the feed-specific parameter; it just shows the search term: music. If you bookmark that URL, it will show you "music" across your subscriptions, which you can then delimit using the dropdown filters:


I don't actually have any search terms that I bookmark, but I really appreciate how Inoreader URLs work. If there is a search term you want to bookmark in your browser, you can do that easily!


Next up: I'm going to revisit the power of RSS and talk about RSS content sources beyond the blogging world, starting with Diigo RSS.


Inoreader Star for Workflow


I often joke that Inoreader is my LMS, and I certainly spend way (WAY) more time with Inoreader every day than I do in Canvas, my school's LMS. In this post, I want to describe one of my favorite features for workflow in Inoreader: the Star feature. If you use the Star feature in Gmail or Google Drive, you already know how the Inoreader Star works: it's a simple flag that you can turn on or off for any content item (i.e. any student blog post).

The way I use the Star in Inoreader is to let myself know that I've left a comment on a blog post. That's important for me in two ways:


Star for specific assignments. During the Orientation, I leave a comment on every student's Favorite Places Post and on their Introduction. Those are the only posts of the semester where I leave a comment on every post, and it takes me a while to do that. I finish all the Favorite Places comments during the first week, but it takes me another week or two to finish all the Introduction posts. To keep track of that, I go to the tag for that post and I use the list view, adding the star as I comment one each post:


I know I'm done when every post in that folder has a star.


Star for individual students. Aside from the Favorite Places and Introduction posts, my comments on people's blogs are random; the blogging space is really more for the students to interact with each other (I mostly interact with them through their projects). But I do comment on a few blogs at random each week along with posts the jump out at me for some reason in the stream, and I use the star to mark the blogs I've commented on. That means I can also look at an individual student's blog overall and see how often I've commented:


I rely on the randomizer to help me comment on everybody's blogs periodically, but I can also review all the blogs very quickly by clicking through them to see where there are stars.


So, the Star is very useful for me in keeping track of my interaction with the students in their blogs. Next up: the Inoreader Search feature, which I use to help me connect one student to another.


Inoreader Bundles


The Inoreader export in the form of HTML Clippings is a premium feature, but you can also combine and share feeds in the form of Inoreader Bundles, which is a free feature. For someone to view your Bundle, they also need to have an Inoreader account (again, a free account works). You can find out more at the Inoreader Bundles page; here's a quick overview step by step:

Make a Bundle

To make a bundle, go to the Preferences (click on your user image in the upper right-hand corner), and then choose Bundles from the Collaboration menu.


You will then see the Bundles screen which lists all the Bundles you have made, plus a New button in the upper right-hand corner.

You can browse your feeds by folders as you add them to the Bundle, so if you have all your course-related feeds together in a folder, it's easy to add them quickly to the Bundle. (But remember, if you add new feeds to that folder later, you'll need to come back and add them to the Bundle too.)


Remember to click Save when you're done.

Share the Bundle

You can then click on the Share icon to get the address for the Bundle which you can share with others. For example, here's the address for the Summer 2020 Blog Fest Bundle:
https://www.inoreader.com/bundle/0014cd640a7d

As you can see, a Bundle URL is not specific to your account, although you are the only one who can edit the bundle. You can share this link and anyone with an Inoreader account will be able to view the Bundle. You have the same different viewing options for a Bundle as for other Inoreader content:


So, for example, here's the card view of that Bundle:


That's it! I don't have a lot to say about Bundles since I focus on the HTML Clippings export feature for sharing Inoreader content with other people. But if you want to use just the free Inoreader and make the class stream accessible to your students, this is one way to do that. Especially if you want your students to learn how to use Inoreader for themselves, a class Bundle would be a great way to get started.


Next up: one of my favorite features for workflow in Inoreader: Inoreader Star for Workflow.


May 15, 2020

More about Export: OPML


In addition to HTML export and RSS export, I want to mention OPML export, which is a file format that can be used to export groups of feeds, specifically so that you can move a collection of feeds from one RSS reader to another. In other words, you can share your folders with other people, including people who use Inoreader as their feed reader, or for them to use at another feed reader like Feedly.

OPML is one of those export options you see when you click on a Folder, and then View Folder Information:


When you click on OPML, you will see the XML file that provides all the information about the feeds in your folder. For example, this is the file for the Summer2020 Blog Fest folder I've created this summer:
https://www.inoreader.com/reader/subscriptions/export/user/1005987531/label/Summer2020BlogFest

Static OPML. Notice a big difference here from the RSS option: this is a list of the feeds in that folder at this time. If I add new feeds to the folder later, people who have subscribed to the feeds using this file in the past will not automatically be subscribed to the feeds I've newly added. So, for example, I can take this URL, go to Feedly, and subscribe to those feeds. Feedly opens the OPML file and then gives me the option to click-click-click to subscribe to those feeds individually.


To be honest, because it is static, and because the Feedly interface for the import is so poor (at least, I am not.a Feedly fan), if a student is subscribing with Feedly, the RSS export is way better.

But for people who are using Inoreader........ there is an amazing option: dynamic OPML subscriptions.

Dynamic OPML. This is an ingenious feature at Inoreader that (so far as I know?) is not available at other feed readers: dynamic OPML. With Inoreader, you can subscribe to an OPML file address, and then Inoreader will ping that file, just like it pings RSS sources, updating that OPML file to reflect new subscriptions. For more about how that works, see the details from Inoreader here: OPML Subscriptions.

This type of dynamic OPML subscription is available for people using the free Inoreader service, so if your students are using Inoreader, you offer them the option of subscribing to the dynamic OPML file for your class folder if you want. That would mean that, instead of just seeing all the class content as a single feed, they would see all the individual blog feeds in the folder.

So, to subscribe to the OPML file, you would go to Preferences - Import - OPML Subscription.


Presto: like magic, your students see the same folder and feeds that you do, which allows them not only to browse the network as a single content stream, but also as the individual blog feeds of students in the class.


Plus, as you add new students to the class, the feed updates automatically! For free accounts, those updates to OPML subscriptions happen just once every 24 hours, but that's fine!

I don't know about you, but whenever I load up an OPML subscription like that in Inoreader I just kind of gasp: it's one of those magic moments where I think about the seriously smart people who build these data standards and applications. It is just SO COOL.

Okay, now that we've covered those three types of Inoreader export, I will move on next time to talk about Inoreader Bundles, which is a way to browse and share collections of feeds within the Inoreader system. (And, unlike export, Bundles are part of the free Inoreader application.)


More about Export: RSS


In previous posts I talked about Inoreader HTML export for folders and tags, and also how to embedding Inoreader HTML in other webspaces like websites and the LMS. In this post, I want to talk about another one of the ways you can export folders and tags, and that is with its own RSS feed.

First of all: why would this be useful? Here are just three possibilities:

Share your curated content. Exporting by RSS is a way to share curated content (tags you've created, folders you've created) with others who are interested in that topic. (If you use Twitter, it would be similar to someone subscribing to one of your Twitter lists.)

RSS in your class webspace. Another way this could be useful is if you have some kind of RSS subscription feature in your LMS or other course portal. You could create a course-related tag and use that tag to send all kinds of content to your LMS via that RSS feature. (I honestly don't know if any LMSes have features like that... but they should!)

Students subscribing to course content. Finally, if you teach your students about RSS and encourage them to learn how to use an RSS reader (Feedly is great for students, for example; more user-friendly for beginners than Inoreader), the RSS export feature makes it easy for them to subscribe to the class blog network and/or to specific assignments or other class-related content in their own feed reader.

How to export folders and tags as RSS

You already know how to do this! RSS is just another one of those export options that you see after you turn on the export for a folder or for a tag. Just click on a Folder, then click on View Folder Information (using the little down arrow next to the folder name in the top navigation bar to open the options); you'll then see the RSS link among the export options:


Here's the URL for the RSS feed that you will then see:

So, for example, I could share that link with students, and they could subscribe to it in Feedly or in Inoreader. Here's what that looks like in Inoreader, for example; as you can see, the difference is that instead of seeing the individual feeds in a folder, the person just sees one continuous stream of content because this is just one feed that they have subscribed to:


And you can use that same RSS feed to subscribe with Feedly:


What's very cool and convenient is that this RSS feed reflects the contents of my folder dynamically. As I add new blogs to my folder, the content of those blogs will go into the feed. The subscriber doesn't have to do anything differently; all the contents of all the feeds in my folder will appear via the RSS export.

Next up: I'll explain about Export with OPML which is a way to export the actual feeds in a package, as opposed to the consolidated content stream as RSS.


May 14, 2020

Embedding HTML Clippings


Okay, I've reviewed some information about folder export and tag export, and now I want to talk not just about the HTML page that Inoreader generates for the export, but also the iframe code snippet you can use to embed that page inside a blog post, webpage, or LMS Page.

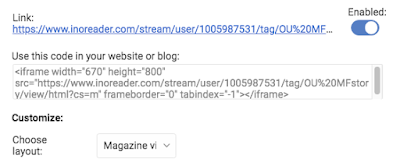
You might have noticed that Inoreader provides you with an iframe snippet in the HTML export dialogue box:


In the same way that the URL for the HTML page updates as you change the parameters, so does the iframe snippet. When embedding content, usually the width and height parameters are the most important, and of course you can also select all kinds of other iframe parameters. I'm not an expert, but that's all that's going on here: Inoreader is taking the address of the HTML page and then giving you the iframe code snippet you need to embed that HTML page with the various iframe parameters. If you are an iframe expert, you can edit that code snippet however you want with the iframe parameters you want to use.

EXAMPLES

So, probably the best thing I can do here is just show examples of how/where I've used the iframe option to embed Inoreader content in other spaces.


WEBPAGE. I already shared earlier how I use Inoreader to embed a stream of my latest blog posts (combined across multiple blogs) here at my own personal homepage, MythFolklore.net.

Here's that snippet:

<iframe width="700" height="900" src="https://www.inoreader.com/stream/user/1005987531/tag/Laura%20Blogs/view/html?cs=m&n=3&w=620" frameborder="0" tabindex="-1"></iframe>


As a class-related example, here's a webpage in the class wiki where I share the content stream for a specific assignment in class: Wikipedia Trails. Especially at the beginning of the semester, it can be helpful for students to see examples of other student work for an assignment, so I include these pages together with the instructions so that students who learn best by example can take a look.

Here's that snippet:

<iframe width="620" height="800" src="http://www.inoreader.com/stream/user/1005987531/tag/OU%20WikipediaTrail/view/html?cs=m&t=Snippets:&n=50&w=500" frameborder="0" tabindex="-1"></iframe>


BLOG POST. You can see how I embedded the Summer2020 blog stream in this blog post: Latest Posts via Inoreader.

Here's that snippet:

<iframe frameborder="0" height="3300" src="https://www.inoreader.com/stream/user/1005987531/tag/Summer2020post/view/html?cs=m&t=Summer2020%20Blog%20Fest%3A&n=12" tabindex="-1" width="100%"></iframe>


LMS. This is one of my very favorite things: embedding the class blog stream inside Canvas. It's the Canvas blog invasion! This is also where students "see" the blog network as a whole, and I use this page as a jumping off point for some assignments in class.

Here's that snippet:

<iframe src="https://www.inoreader.com/stream/user/1005987531/tag/OU%20MFPosts/view/html?cs=m&t=Snippets:&n=50&w=600" width="720" height="5000"></iframe>


Okay, those are some examples, and I'm glad to brainstorm about ideas and possibilities anytime. I export lots of content from my class blog streams (and also from Diigo; more about that in a separate post), and it's fun to think about new ways to re-use content, putting it in new contexts that add new meaning and purpose.

What's up next? I'll talk about Exporting as RSS, which is also a great way to share the Inoreader content that you are collecting.


Inoreader Export: HTML Clippings (Tags)


So, in the previous post I explained about Inoreader HTML export, and specifically how that works for folders. In this post, I'll show how that works for tags, along with some more thoughts about tags and folders in Inoreader.

To turn on and then configure HTML export for a specific tag, just click on the tag in the left-hand column, and you will see the same menu options (well, mostly the same) as for folders:


When you click on View tag information, you will see the same options for activating the export features, including HTML (although there is not an OPML option, and I'll explain how that works in the post about OPML).


When you click on HTML clip, it gives you the same options to generate the HTML export, along with the iframe code for embedding, etc.


The reason the tag HTML export interface works just the same way as with folders is because, in terms of Inoreader architecture, folders really are tags, but with a few key differences that I will explain below.

Folders versus Tags

The best way to think about folders in Inoreader is that they are like "automatic tags" that you cannot alter. You'll see what I mean when you edit the tags for an item from a feed that you have in the folder: you will see the folder name listed as a tag, but unlike the tag-tags, you cannot delete the folder tag. You can see how that works when you are editing tags on an item. For example, this item comes from a feed that is filed in two folders, so it has two folder tags, plus there are two additional tags; those additional tags have little x's by them because I can remove those tags, but the folder-tags cannot be removed:


So, folder tags are super-convenient because Inoreader assigns them automatically; you don't have to use a rule. Inoreader just does that for you, and since you can put feeds in multiple folders, you can build a strong system just using folders to organize your content. I'm guessing many people rely on folders in Inoreader without using tags at all.

But there's the thing: if you want item-by-item control, tags are the way to go. With tags, you can create rules that automate how the tags are assigned, but you can also override those rules by manually removing a tag, and you can also add tags manually at any time.

For example, with my classes, I put the students' blog feeds in folders by class, but I also use a rule to automatically assign a class tag to every item in those folders. Basically, it duplicates the folder tag but with this important difference: I can remove my tag if needed. So if a student accidentally posts something in their class blog that's an assignment for another class (which has happened), I can remove the tag, and thus remove it from the class stream. Also, if a student ever did post something inappropriate, I could remove it from the class stream by removing the tag. That's never happened, but just for my own peace of mind, I like the fact that tags give me control, item by item, of everything that appears in the export stream.

So, that's a strategy I would recommend to people if you will be using the HTML export features. Instead of exporting folders, instead think about setting up a rule that also assigns a tag to every item in a folder, and then export-by-tag instead of export-by-folder. It's really not that much overhead (you set up the rule and it runs in the background; you don't have to do anything), and if/when you actually do want to add or remove an item manually from the export stream, you'll be able to do that!

Okay.... that's the nitty-gritty of exporting folders and tags as HTML, and now something really cool: Embedding HTML Clippings.


Inoreader Export: HTML Clippings (Folders)


Okay, now I get what is the most fun thing about Inoreader, which is the ability to export both folders and tags in the form of HTML. This is a premium feature (currently $50/year), and to me it makes the whole service worth it. With the HTML export, you can take any folder or any tag and have Inoreader generate an HTML version of the contents, either the full contents, or a magazine view which has an image and a text snippet. Both export formats link the titles to the original source (i.e. blog post) so that readers can click on the title and see the content in its original context.

An Example of Inoreader HTML Embedded

To get a sense of how that works, take a look at my own personal homepage at MythFolklore.net. In the upper right there is a stream of my most recent blog posts across all my blogs. I usually have about four or five blogs where I'm actively publishing content at any given time; I've got an Inoreader folder with all my blogs in it (active, dormant, ALL my blogs), and whenever there is a new post, it shows up there on my homepage! Here's what it looks like at the moment; as you can see, I was working on Aesop last night, but when you click and go there now, you might see something different! This blog post will show up there, for example, as soon as I publish it.


How this works: Inoreader is generating an HTML page with my content that I then put inside an iframe so that it appears in that webpage. Here's a link to the HTML page that Inoreader is publishing; I've tweaked this URL so that it shows 100 items instead of just 3:
https://www.inoreader.com/stream/user/1005987531/tag/Laura%20Blogs/view/html?cs=m&n=100&w=620

If you look through the URL there you can see how it works: width, number of items, and display style are parameters in the URL, and Inoreader is publishing the "Laura Blogs" content because I activated this feature. By default, content is not published, but when you publish the content, then anyone can access it via these HTML export views.

I embed Inoreader HTML content in webpages, inside Canvas, inside blog posts, and also inside my class wiki. It goes anywhere that you can use iframe, and you can also just link to the HTML pages directly as I did above. I'll explain in a separate post about the embedding; what I'm going to do here is explain how to activate the HTML export of a folder in Inoreader.

Activating HTML Export: Folders

By default, exports are not turned on, so you need to turn on the export for any folder (or tag) you want to export. (You can also export as RSS, OPML, and JSON; I'll say more about RSS and OPML later... I'm sure the JSON is very cool too, but that's not something that I know how to use.)

Start by clicking on a Folder in the left-hand navigation, and then you will see that folder name appear across the top horizontal navigation. Click on the little arrow pop open menu options for the folder:


From those options, choose View Folder information, and you will see where you can turn the export features on:


After you have activated the output feed by sliding the slider to on, you can then click on HTML Clip and you will see a panel that lets you configure lots of different parameters:


Just which parameters you will want to alter depends on your purposes. The options I use the most are magazine view versus expanded view, width, and items per page.

As you make changes to the parameters, it alters the Link URL that is displayed there. You can click on the link anytime to see what the results look like based on the parameters you currently have set. Once you get used to how this works, you can actually edit the URL yourself without going through this dialogue panel; all the parameters appear as variables in the URL.

Okay, those are the basics of the HTML export, and next up I'll explain HTML Export for Inoreader Tags (basically the same, but I'll explain a bit more about differences between tags and folders).


May 12, 2020

Inoreader Rules


Rules for tags. The reason I pay for the "pro" version of Inoreader is so that I can create rules that assign tags to incoming content automatically. You can get a lot of use out of Inoreader tags by just assigning them manually, but when you can assign tags to all incoming content with rules, that is a big help in organizing that content.

In the case of my classes, I have about 100 students every semester, and they are usually writing several blog posts each week, which means hundreds of incoming blog posts. Thinking about it like email: if you use rules and filters in your email, you will probably find it worthwhile to get an Inoreader pro account (currently $50/year). With a Pro account, you can create up to 30 different rules, along with many other features such as active searches, that can help you manage large amounts of incoming content.

Creating rules to assign tags. You can access the Rules through the Preferences. Here's what the interface looks like for creating rules: it is extremely powerful! You can define multiple trigger conditions, and also multiple actions if the trigger conditions are satisfied:


So, for example, you can have Inoreader assign tags to incoming content based on keywords in a specific folder and with keywords in the item title. That's the approach I take with my classes. I ask students to include specific words in their blog post titles, and rules assign those posts to different tag streams which I can then read and review by assignment. I can also make manual adjustments, adding the tag manually if the student forgot to include the keyword in the title.

Other rule actions. This screenshot shows the different actions that you can use in rules. The ones I use are to assign tags (sometimes assigning multiple tags in a single rule) and also to mark-as-read, but perhaps you will see some other rule options here that would be useful to you:


For example, if you want to mark student work in Google Drive, I can imagine that would be a useful rule action.

IFTTT and Inoreader. Another way to automate your Inoreader workflow is by using the service IFTTT. Inoreader is one of the services that you can add to IFTTT recipes: IFTTT - Inoreader.


I've used IFTTT to automatically repost content to a Blogger blog, and that worked really well. I have not explored any of these other IFTTT options, but it can definitely be a powerful tool!

So, those are some thoughts about automating your Inoreader experience. Next up: Inoreader Export: HTML Clippings (Folders).


Inoreader Tags


Inoreader tags are one of the best features of Inoreader! Any Inoreader item can have multiple tags, and you can use those tags both to organize your reading experience and also to export posts with a particular tag. I'll say more about exporting later; in this post, I'll focus on how you assign tags to post and how that can support your use of content inside Inoreader.

Folders and tags. When you look at an item in Inoreader from a feed that you have put in a Folder, you will see the Folder name as a tag! So, if you are using Folders, that means you are already using Inoreader tags. Just look at the bottom of any Inoreader item, and you'll see the tag(s) there, starting with the Folder name as a tag:


The difference between Folder-as-tag and other tags is that you cannot control Folder-as-tag: it is applied automatically, and it cannot be changed. In addition to that Folder-as-tag, you can add your own tags to any item.

Adding tags. As you add tags to items, you will then see those tags show up in the left-hand navigation panel up at the top, above the folders, so that you can then browse by tags the same way that you can browse by folders and by feeds.


Just pop open the tags like you would pop open a folder, and select the tag you want to view.

Tags for workflow. If you look at the screenshot above, you'll see a tag that says "problem"  which is an example of how I use tags for workflow: when I see a student blog post that has a problem (like a hot-linked image that needs fixing), I just add the tag "problem" to the item, and then later on during the day when I have time I'll go through those posts, contacting students as needed, and then removing the "problem" tag as I do. That's just one example; I use tags like that constantly in Inoreader for all kinds of purposes, putting posts together in tagged collections that I need to work on for whatever reason.

So, you can use tags manually, but you can also use rules to assign tags; that's what we'll look at next: Inoreader Rules.


Inoreader Folders


Okay, I mentioned putting feeds in folders already because each time you add a feed, Inoreader prompts you to put that feed in a folder. It's okay if you don't do that right away, though, because you can add feeds to folders any time.

Feed-and-Folder Panel. You'll see all your folders in the left-hand navigation panel, along with feeds that are not in folders (yet). You can drag and drop to rearrange items in the navigation, and you can also drag and drop feeds into folders. (You cannot put folders within folders though.) When you click on a folder title, you will see all the contents of all the feeds in that folder on the right. When you pop open a folder, you will see all feeds in that folder and can click on those individually, see the contents of each specific feed to the right.

Student Feeds / Class Folders. The way I run my blog network is that I subscribe to each student's blog feed, and then I put those feeds in class folders: I have one folder for each class, plus a folder for all classes. That means each student's blog feed is found in two folders: in a specific class folder, and in the all-classes folder. This allows me to look at incoming content in three different ways: by student, by class, and by all-classes. I don't organize the students alphabetically inside the folders because I can just use Control-F to find the student I need:


Assigning to Folders. You can see what folder(s) a feed is in at any time by clicking on the little down arrow next to the feed name that appears in the top menu:


If you have lots of folders, as I do, it's very handy to use the "filter folders" option which will display filters based on a text string. So, for example, if you use an abbreviation for the year/semester you can quickly display just the folders for that semester.


Folder Options. Just like with a feed, you can click on the down arrow next to the Folder name in the top navigation menu and see various folder options. One of those options is an email delivery service! I'm just trying that out for the first time now. (I think this is a premium feature, not available for the free accounts.)


During the school year, I'm using Inoreader during the day on and off all day every day, but during the summer it's easy to forget. I'll report back on what the email looks like when it is delivered.

Preferences: Folders. You can manage folders in a different way through the preferences panel, which you access through the upper-right-hand corner avatar link to your account, like this:


The subscriptions panel in the preferences is a way you can see all your feeds and folders. The folders panel lists all your folders and shows which ones you have activated for RSS/HTML export (I'll say more about that later), and you can use the feeds panel here to look at all the feeds in a folder, like this:


This is where, for example, you can "boost" a feed so that Inoreader pings it more often (that's what the rocketship icon is for). With Blogger, though, Inoreader is set up to ping it in (almost) realtime so there's no need to give it a boost.

This Preferences view is also a way that you can check for feeds "without folders" if you want to make sure you have all feeds in at least one folder (that's my organizational strategy).

So, that's all I can think of to say about folders, but you can let me know if you have any questions... next up: Inoreader Tags.

May 10, 2020

More about RSS for Blogger Comments and Labels


In this post, I want to quickly explain about how to find and use RSS feeds for blog comments and also feeds for specific posts by label from a blog.

Blogger Comments

In the post about subscribing to feeds with Inoreader, I mentioned that Inoreader will automatically detect the blog comments feed for WordPress blogs. Now that you've had a chance to subscribe to some feeds and explore the reading experience with Inoreader, I wanted to circle back around to this question of subscribing to blog comments. That may or may not be important for your personal blog reading, but it is definitely important for student blog networks.

So, there are indeed comment feeds for Blogger blogs, and here is how to find the address you need:

First, start with your blog address. For example, this is my class blog that I use when I'm a student in the Myth-Folklore and Indian Epics classes (I participate as a student in addition to teaching the classes):

https://religiousreading.blogspot.com/

To get the comments feed, I just add feeds/comments/default to that address:

https://religiousreading.blogspot.com/feeds/comments/default

That's the address I can copy-and-paste into Inoreader in order to subscribe to the comments on that blog:


Yes, it's a bit tedious not being able to have Inoreader automatically detect the Blogger comments feeds, but I use a hack to help me with that. As students give me their blog addresses, I put that address into a spreadsheet (which is helpful all semester long), and in that spreadsheet I have a column that automatically adds "feeds/comments/default" to that address. It's a concatenate formula:


Which gives me the comments feed URL I need to paste into Inoreader:


I'll say more about the logistics of student blog addresses and building the network in a future post.


Blogger Labels

Inoreader does not do any autodetection for blog feeds that are based on labels, so if you want to subscribe to just a specific label at a blog, you need to know how to create the URL address on your own. You can use these models to generate the address you need. And be warned: these URLs are case sensitive, so make sure you get the correct capitalization of the label.

https://___.blogspot.com/feeds/posts/default/-/___

For example, here are the Summer2020 posts at this blog.
https://oudigitools.blogspot.com/feeds/posts/default/-/Summer2020

Being able to subscribe to specific labels can be really useful when you have a blog that you use for multiple purposes.


A word about WordPress Feeds

There is a huge array of RSS feeds available for WordPress blogs; see the WordPress Support site for all the details: WordPress Feeds.


So, now you know even more about how feeds work, and next up is more information about putting feeds in Inoreader Folders.